CREATING A GARDEN / RETAINING WALL
HOW TO START
What is the purpose of the wall – will it be a retaining wall for soil, rocks, a large building? How long and high will the wall be? Will you be using natural or manufactured stone?
Take the time to do some research. Look at different designs and styles and see which ones suit your taste, budget and purpose. We have many design booklets available at Silverthorn Landscape Supplies to give you great ideas.
Get your measurements! Write down your length, width, and height. Write down all measurements and be sure to include slopes and any differences in grade throughout the area you are planning to build on.
Sketch out a plan. Be sure to include your measurements and write down specific products that you know you’d like.
How much will you need? See our Formula & Calculator to figure out how much product you will need. If you need assistance figuring out how much is needed for your project feel free to come in or 519-765-2379 us anytime.
Getting your products: Will you be picking them up, or getting them delivered? Either way, it is important to come in or 519-765-2379 us ahead of time to ensure we have the products in stock and or a delivery spot available for you.
TOOLS YOU MAY NEED
![]()
paper & pen
![]()
tape measure
![]()
stakes & string
![]()
marking paint
![]()
square
![]()
level
![]()
shovel
![]()
wheelbarrow
![]()
rake
![]()
gloves
![]()
safety glasses
![]()
knee pads
![]()
rubber mallet
![]()
hand tamper
![]()
broom
PRODUCTS YOU MAY NEED

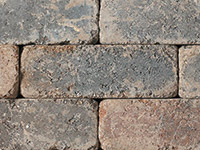
wallstone

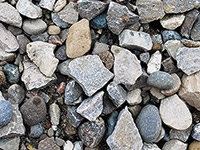
A-gravel

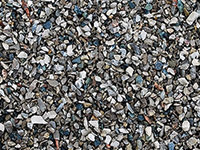
limestone screenings
*Note: There is a new product called Advanced Performance Bedding which can be used in place of A-gravel and Limestone Screenings. APB is specially designed to self-compact, while still allowing for proper drainage. Using APB eliminates the need to tamp your base every 2”. Instead, tamping occurs once the pavers have been laid. For more information on APB, or to learn more about when to use it versus A-gravel and Limestone Screenings, come in or give us a 519-765-2379.
OPTIONAL ADDITIONAL MACHINERY
• Skidsteer • Stone Saw • Vibrating Tamper / Plate Compactor
*Make sure you are qualified to run any equipment you may rent, or have someone who is experienced with machinery come out and help.
INSTALLATION
1. PLAN
Go through the How to Start list, make a good plan, be sure to include your measurements, which type of product you need, and quantities.
2. PREPARATION
Mark out the area to be excavated.
*Remember to call the appropriate utility companies to find out where any lines may be buried before you dig! Phone, cable TV, internet, gas, hydro, waterlines, city piping…etc.
3. EXCAVATE
Excavate the area a minimum of 7 – 12” deep (depending on your exact project type). Be sure to remove all loose soil. The width of your base should be two times the depth of your wall unit.
Keep in mind you need to have enough room for a minimum of 6” of solid base, and at least 3” of wall unit buried below grade level. This ensures stability and durability of your wall.
4. BASE
Place A-gravel into the excavated area, compacting every 2”. Grade the base as close to the final outline of your project as possible. Continue to add gravel and tamp every 2” until height requirements of your project are met. Be sure to slope all installations away from buildings, for drainage purposes. (Minimum slope is one inch across every ten feet). Your gravel base should leave enough room for the first 3” of the first row of wall units to be buried below grade level.
5. LAYING WALLSTONE
Once you have a solid, level, compacted base, lay some Limestone Screenings down for your wallstone to sit on. Lay your wallstone directly on the bed of screenings. Level each stone front-to-back and side-to-side. Once the first row is laid (at least 3” of which should be below ground level) continuing stacking the units. If you are using manufactured stone start the second row with a stone cut in half, this will offset the vertical joints.
6. BACKFILLING
Line the inside of your wall with weed barrier fabric before adding backfill, to separate soils from gravels and prevent mud and weeds from seeping through your wall.
After every two rows of wallstone add ¾ “ clear gravel as backfill. The gravel backfill should go up to the layer of wallstone before your coping.
7. FINISHING TOUCHES
Once you have stacked all your wallstone and you are ready for the coping (very top layer), sweep off the wallstone and glue your coping in place.
*It is important to dry fit and cut your coping before gluing, to ensure they fit properly. Once the glue has dried you can backfill with soil, put down sod, plant your greenery ... etc to finish your installation.
DONE!
There you have it! A beautiful retaining wall!
PRINT INSTRUCTIONS
HOURS OF OPERATION
If there is bad weather, please give us a call to check if we are still open. Sometimes we close early due to inclement weather.
519-765-2379
APRIL
Monday – Saturday: 8am – 5pm
Sunday: Closed
MAY
Monday – Wednesday: 8am – 5pm
Thursday – Friday: 8am – 6pm
Saturday: 8am – 5pm
Sunday: Closed
JUNE
Monday – Saturday: 8am – 5pm
Sunday: Closed
JULY
Monday – Saturday: 8am – 5pm
Sunday: Closed
AUGUST
Monday – Friday: 8am – 5pm
Saturday: 8am – 3pm
Sunday: Closed
SEPTEMBER
Monday – Friday: 8am – 5pm
Saturday: 8am – 3pm
Sunday: Closed
OCTOBER
Monday – Saturday: 8am – 3pm
Sunday: Closed
*Appointments available after 3pm.
Call 519-765-2379 to schedule
NOVEMBER
Monday – Friday: 8am – 3pm
Saturday: 8am – 1pm
Sunday: Closed
*Appointments available after 3pm.
Call 519-765-2379 to schedule
HOLIDAYS
CALL 519-765-2379
For updated 2023 Holiday Hours
CLOSE
CUBIC YARD
CALCULATOR
CLOSE